Game frame rate
I haven’t tested my P106-100 6GB graphics card with games since I bought it.
The most direct indicator of a graphics card’s game support and functionality is frame rate; the higher the frame rate, the better the experience.
So I looked into some online frame rate display solutions.
One is NVIDIA’s built-in frame rate display, but I couldn’t find the function in my tests; AI said it’s only available in older drivers or software.
There are also some open-source or related third-party software, but they’re too complicated, and I’m too lazy to download the corresponding software (I might end up with a pirated version).
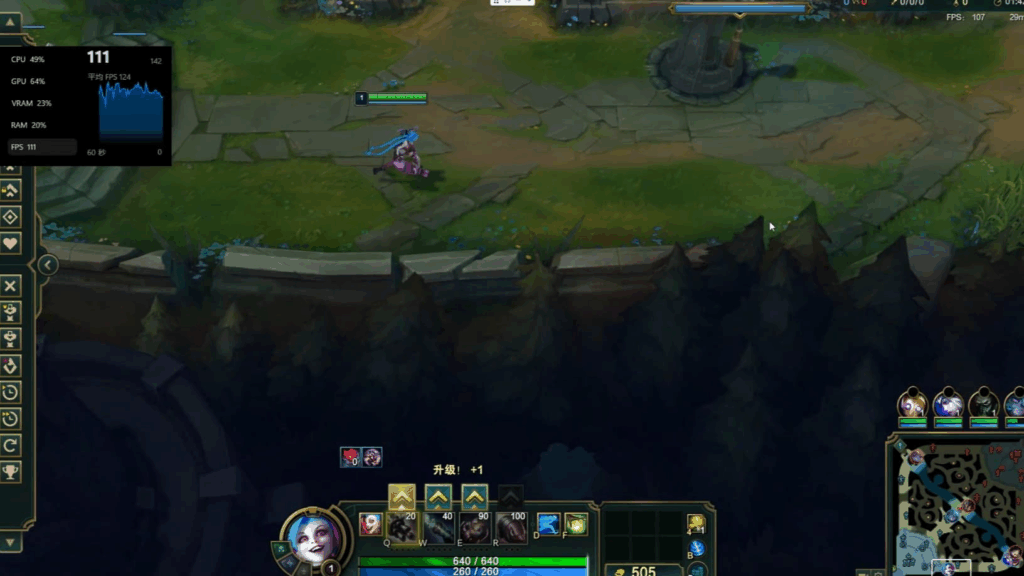
The last one is the built-in performance monitoring and display in Windows, which not only displays the frame rate but also simultaneously shows memory, CPU, GPU, and other usage.
The left panel in the image below is the built-in Windows panel.
How to operate
First, open the game.
Remember, the game requires full-screen mode.
Then, press and hold the Win+G keys simultaneously.
In the toolbar that appears, click the Performance button.
You can choose to click the Pin button for the Performance panel, which will keep the panel always on the screen.
Alternatively, you can drag the panel with your mouse to adjust its position (up, down, left, right, etc.).

Actual effect
I tested several games: Stardew Valley on Steam, which maintained a stable 60 FPS; QQ Speed and CrossFire, both maintaining a stable 120 FPS; and Delta Force, which only reached 40 FPS.
For someone like me who doesn’t play games much, anything above 30 FPS is already quite good.
After all, the P106-100’s performance is barely enough for testing AI, and its capabilities are inherently limited.
It can basically run most mainstream games, but it probably won’t be able to handle games with very demanding system requirements.